前言:
更新于2025年1月9日
本文档为python基础语法介绍,最好是有其它语言基础,想深入了解详细的细节、参数请查看 官方文档我所用参考书籍:《python编程从入门到实践》-[美]Eric Matthes著-袁国忠译-人民邮电出版社
这本书十分适合于零基础学习,但奈何我水平有限,无法将全部细节展示,只能给出一个大致语法,用于有基础的朋友快速上手使用。本文档的内容推出后,收集并解决了一些问题,但仍有不足之处, 还请多多反馈和建议,我会尽量进行解决。联系方式:主页 -> 关于
一、简介
更新于2024年12月13日
Python是基于C语言开发的,是一种高级的、解释型、动态类型、面向对象的脚本语言,Python自2004年以后的使用率呈线性增长,目前已经成为最受欢迎的的程序设计语言之一。 众多开源的科学计算库都提供了Python的调用接口,如计算机视觉库OpenCV、三维可视化库VTK、医学图像处理库ITK等。 Python专用的第三方库也很多,如科学计算库NumPy、SciPy、Pandas等,分别提供了快速数组处理、科学计算和数据分析功能。
特点:简单易学,面向对象,可扩展性和可嵌入性,丰富的库和模块。
应用:数据处理,网络爬虫,人工智能与机器学习,应用开发,嵌入式。
个人看法:和C这种语言相比,python更为方便快捷,在开发中可以快速成型,同时各种库包也使功能得到扩展,如果是纯当做一个工具,相对来说比C要实用。
执行效率:C > python,C优化更好,运行速度也更快
开发效率:C < python,python实现功能方便,不用重复造轮子二、下载安装
更新于2024年12月13日
python并不是越新的版本越好,不同的库有不同的版本要求,初学时可以随便下一个3.8以上的版本,多版本可以共存,后续可以根据需求下载其它版本。
开发环境使用pycharm,拥有代码补全,强大的调试测试能力,便携的版本与库管理。以及更多的实用功能,就留给各位自己探索了。 python和开发环境的下载安装就不过多讲解了,可以跟着教程做: python和pycharm的下载安装 以及 汉化三、让我们开始吧!
更新于2024年12月13日
3.1. Hello World
新建项目,选择创建欢迎脚本,不创建也行,解释器选择venv(相当于将虚拟环境设置在当前项目文件夹下,配置以及后续导入的库就放在这个文件夹里),conda用于管理环境和库包,暂时用不上。
在示例脚本中,已经给出了几个基本的快捷键:shift+F10 运行,ctrl+F8 设置断点,没有这个示例文件也没关系,新建一个.py后缀文件,顶格输入 print("Hi PyCharm") ,运行,下方弹出运行结果:Hi PyCharm,这样配置就基本完成了,查看左下角几个图标,重点介绍几个。1.运行:当前程序的运行效果,包括输入输出,类似C语言运行时的窗口。
2.控制台:提供交互模式,可以直接在这里运行代码,例如输入1+1并回车,得到输出2。
3.软件包:对安装的库包进行管理,或导入新的库。
4.终端:相当于在本目录下打开的powershell(cmd升级版),进行环境切换、pip命令安装等。
顶部菜单栏的功能就留给各位自主探讨了。下面对代码部分进行说明。
欢迎示例代码 [点击展开]
# 这是一个示例 Python 脚本。

# 按 Shift+F10 执行或将其替换为您的代码。
# 按 双击 Shift 在所有地方搜索类、文件、工具窗口、操作和设置。

def print_hi(name):
    # 在下面的代码行中使用断点来调试脚本。
    print(f'Hi, {name}')  # 按 Ctrl+F8 切换断点。

# 按装订区域中的绿色按钮以运行脚本。
if __name__ == '__main__':
    print_hi('PyCharm')
另外,最好在代码文件的最后留一个空行,因为部分编译器会要求留一个空行!
3.2. 注释的添加方式
注释非常之重要,决定了他人能否看懂你写的程序,甚至是为了让你自己过一段时间也能看懂!
# 这是单行注释

"""
print("这一段不执行")
三个双引号多行注释
"""
#或者
'''
print("这一段不执行")
三个单引号多行注释
'''
3.3. python之禅
使用import this来直接输出,python社区的理念都包含在其中,对于新手来说至关重要。
import this [点击展开]
import this  # 输出python社区的理念

'''
The Zen of Python, by Tim Peters #《Python之禅》,作者:蒂姆·彼得斯

Beautiful is better than ugly.                                        #优美胜于丑陋
Explicit is better than implicit.                                     #明了胜于晦涩
Simple is better than complex.                                        #简单胜于复杂
Complex is better than complicated.                                   #复杂胜于凌乱
Flat is better than nested.                                           #扁平胜于嵌套
Sparse is better than dense.                                          #间隔胜于紧凑
Readability counts.                                                   #可读性很重要
Special cases aren't special enough to break the rules.
Although practicality beats purity.                                   #即使实用比纯粹更优,特例亦不可违背原则
Errors should never pass silently.
Unless explicitly silenced.                                           #错误绝不能悄悄忽略,除非它明确需要如此
In the face of ambiguity, refuse the temptation to guess.             #面对不确定性,拒绝妄加猜测
There should be one-- and preferably only one --obvious way to do it. #任何问题有一种,且最好只有一种,显而易见的解决方法
Although that way may not be obvious at first unless you're Dutch.    #虽然这种方法一开始可能并不明显
Now is better than never.
Although never is often better than *right* now.                      #做胜于不做,然而不假思索还不如不做
If the implementation is hard to explain, it's a bad idea.            #很难解释的,必然是坏方法
If the implementation is easy to explain, it may be a good idea.      #很好解释的,可能是好方法
Namespaces are one honking great idea -- let's do more of those!      #命名空间是个绝妙的主意,我们应好好利用它
'''
3.4. 报错信息
在程序存在错误时,会报错,学会按照提示定位错误源,找到错误引起的原因。
prin("hello world")   #执行这一条打印语句

'''
报错信息:
Traceback (most recent call last):
  File "D:\project\pycharm\python_note\test.py", line 1, in module  #提示错误出现在第1行
    prin("hello world")                                             #提示错误出现箭头指向的位置,即 prin
    ^^^^
NameError: name 'prin' is not defined. Did you mean: 'print'?       #造成错误的原因,以及可能的修复方式(不一定正确!)
'''
四、变量和数据类型
更新于2024年12月13日
4.1. 变量可直接命名,不需要加数据类型(但不代表不存在),命名规则:
- 只能包含数字,字母,下划线,不能包含空格。
- 不能以数字打头,不能用关键字和函数名作为变量名。
- 变量名应简短又有描述性,例如:student_name,别再用 a,b,c,d 了!
- 慎用 小写l,大写o,1,0,例如:iO 10,容易被看错。
- 命名可以用中文,但非常不建议。
4.2. 变量间计算
变量间可直接计算,也可同类型输出,但输出时不同类型要进行转换。
print 函数用于输出内容。
#代码:
num1 = 11
num2 = 22
print(num1)
print(num1 + num2)  # + - * / % ** 都行
str1 = "hello"
str2 = "world"
print(str1 + str2)  #使用 + 号可以拼接字符串
print(str1 + " " + str2)
#print(num1 + str1)会报错
print(str(num1) + str1)  #str(num1) 与 f"{num1}" 等效:数据类型转为字符串
'''
输出:
11           #对应print(num1)
33           #对应print(num1 + num2)
helloworld   #对应print(str1 + str2)
hello world  #对应print(str1 + " " + str2)
11hello      #对应print(str(num1) + str1)
'''
4.3. 变量可以用方法或类的属性进行设置
通常为 变量名 . 方法 的格式,方法多种多样,根据自己需求进行查找使用。
#代码:
str1 = "hello"
str2 = "world"
str3 = "ABCD"
print(str1.title())         # .title 实现首字母大写
print(str2.upper())         # .upper 实现全部大写
print(str3.lower())         # .lower 实现全部小写

str4 = "    hello    "
print(str4.strip().upper() + "这是末尾")  # .strip 去除首尾空格
print(str4.lstrip() + "这是末尾")         # .lstrip 去除首部空格
print(str4.rstrip() + "这是末尾")         # .rstrip 去除尾部空格
'''
输出:
Hello
WORLD
abcd
HELLO这是末尾
hello    这是末尾
    hello这是末尾
'''
4.4. 浮点数
浮点数使用方法和整数一样,但受制于计算机内部表示数字的方式,有些情况下会出问题。
可参考:0.1 + 0.2 不等于 0.3?原来是因为这个
>>> 0.2+0.1
0.30000000000000004
>>> 3 * 0.1
0.30000000000000004
五、列表
更新于2024年12月14日
5.1. 列表基础
列表由一系列按顺序排序的元素组成,用 [ ] 表示。
man = ['old','young','tall','fat']
#       0       1       2      3
#       -4      -3      -2     -1      列表中的索引值

print(man)
print('打印指定位置:'+ man[0] +' '+ man[2] +' '+ man[-1] +' '+man[-2])
#-1打印列表最后一个
print( ('hello '+ man[1]).title() )
'''
输出:
['old', 'young', 'tall', 'fat']
打印指定位置:old tall fat tall
Hello Young
'''
5.2. 列表操作
增删改
man = ['old','young','tall','fat']

man[0] = 'change'         #替换
print('替换')
print(man)
'''
输出:
替换
['change', 'young', 'tall', 'fat']
'''

man.append('new_1')       #.append(object)列尾新增
print('\n列尾新增')
print(man)
'''
输出:
列尾新增
['change', 'young', 'tall', 'fat', 'new_1']
'''

man.insert(1,'new_2')     #.insert(index,object)在index值的位置插入新元素
print('\n插入')
print(man)
'''
输出:
插入
['change', 'new_2', 'young', 'tall', 'fat', 'new_1']
'''

del man[0]                #del删除指定元素
print('\n删除')
print(man)
'''
输出:
删除
['new_2', 'young', 'tall', 'fat', 'new_1']
'''

popped_man = man.pop()     #.pop()弹出/删除最后一个元素,.pop(index)弹出指定元素
print('\n弹出尾 ',end="")
print(popped_man)          #尾部元素保存在新变量中
print(man)
print('\n弹出指定 ',end="")
print(man.pop(1))          #没有定义变量直接弹出,弹出元素未保存
print(man)
'''
输出:
弹出尾 new_1
['new_2', 'young', 'tall', 'fat']

弹出指定 young
['new_2', 'tall', 'fat']
'''

man_out = 'new_2'
print('\n删除元素 ' + man_out)
man.remove(man_out)         #.remove(object)删除与object相同元素
print(man)
print(man_out.title() + ' is not on this list!\n\n')
'''
输出:
删除元素 new_2
['tall', 'fat']
New_2 is not on this list!
'''
5.3. 列表排序
列表排序
last_names = ['chen','li','刘','张','唐','曾','an','he','song']

last_names.sort()        #.sort()将列表按字母顺序重新排序并保存,不能直接print
print('顺排序')
print(last_names)
print('逆排序')
last_names.sort(reverse = True) #参数reverse颠倒,T大写表逻辑
print(last_names)
'''
输出:
顺排序
['an', 'chen', 'he', 'li', 'song', '刘', '唐', '张', '曾']
逆排序
['曾', '张', '唐', '刘', 'song', 'li', 'he', 'chen', 'an']
'''

print('\n不保存顺排序')
print(  sorted(last_names)  )   #sorted(object)按顺序排序,不保存,可直接print
print('列表不变')
print(last_names)
print('\n先用保存顺排序')
last_names.sort()
print(last_names)
print('不保存逆排序')
print(  sorted(last_names  , reverse = True)  )  #参数颠倒
'''
输出:
不保存顺排序
['an', 'chen', 'he', 'li', 'song', '刘', '唐', '张', '曾']
列表不变
['曾', '张', '唐', '刘', 'song', 'li', 'he', 'chen', 'an']

先用保存顺排序
['an', 'chen', 'he', 'li', 'song', '刘', '唐', '张', '曾']
不保存逆排序
['曾', '张', '唐', '刘', 'song', 'li', 'he', 'chen', 'an']
'''

last_names.reverse()           #.reverse()颠倒序列
print('\n颠倒序列')
print(last_names)

print('\n列表长度')
print(  len(last_names)  )     #len(object)确定长度
'''
输出:
颠倒序列
['曾', '张', '唐', '刘', 'song', 'li', 'he', 'chen', 'an']

列表长度
9
'''
六、for 循环
更新于2024年12月14日
6.1. for 循环基础
python使用缩进来区分代码段,因此一定要避免缩进错误!同时,循环中定义的变量只在循环中有效!
for循环的使用例,后面记得跟冒号。(通常有缩进的地方就有冒号)
num = 10086
for value in range(5):      #定义value变量,用于存储range(5)生成的数字,0到4
    print(value, end=" ")   #定义的value变量和这一代码块内部的变量只在这一循环部分使用
    print("  循环中")
print("这一句在循环外面")    #使用缩进来表示代码块,相当于用缩进代替了{}

for value in range(2,10):
    print(value,end="! ")   #end=" "表示结尾的字符,默认是 \n 换行
print()

for num in range(2,10,2):   #range(n1,n2,n3),范围n1到n2-1,间隔为n3,默认为1
    print(num,end=" ")      #若变量名有重复,则循环内的变量会覆盖之前的变量
print()
print(num)                  #这里的num变成了循环后的值
'''
输出:
0   循环中
1   循环中
2   循环中
3   循环中
4   循环中
这一句在循环外面
2! 3! 4! 5! 6! 7! 8! 9!
2 4 6 8
8
'''
6.2. for 循环和列表合用
for 循环和列表合用
colours = ['red','green','yellow','orange','blue']
for colour in colours:               #for循环打印
    print(colour.title(),end=" ")
print("")
'''
输出:
Red Green Yellow Orange Blue
'''

numbers_1 = list(range(1,11,2))      #list生成列表,效果与6.1的相同
print(numbers_1)
'''
输出:
[1, 3, 5, 7, 9]
'''

squares = []
for value in range(1,11):            #生成列表表示:1——10的平方
    squares.append(value**2)
print(squares)

squares_2 =[value**2 for value in range(1,11)]  #列表解析,输出相同
print(squares_2)                                #for循环生成value,vlaue**2保存在列表中
'''
输出:
[1, 4, 9, 16, 25, 36, 49, 64, 81, 100]
[1, 4, 9, 16, 25, 36, 49, 64, 81, 100]
'''

print('\n最小最大以及求和:\n'+ min(colours) +'  '+ max(colours)) #str没有sum(object)函数
print(str(min(squares)) +'  '+ str(max(squares)) +'  '+ str(sum(squares)))
'''
输出:
最小最大以及求和:
blue  yellow
1  100  385
'''

print(squares[0:4])             #打印0——3位置的元素
print(squares[:4])              #与上相同,0省略
print(squares[6:])              #7——10
print(squares[-4:])             #同上

for value in squares[:3]:       #切片遍历
    print(value,end="!")
print("")
'''
输出:
[1, 4, 9, 16]
[1, 4, 9, 16]
[49, 64, 81, 100]
[49, 64, 81, 100]
1!4!9!
'''

squares_3 = squares[:]           #复制列表
print(squares_3)
'''
输出:
[1, 4, 9, 16, 25, 36, 49, 64, 81, 100]
'''

tuple = (200,100,50)        #当括号是()时,为元组,值不可修改
print(tuple[1])             #打印可以正常打印
#tuple[1] = 10              #报错,不可修改
for value in tuple:
    print(value,end=" ")
print("")

tuple = (100,40,150)        #()里的值不能改,但变量可以重新赋
for value in tuple:
    print(value,end=" ")
'''
输出:
100
200 100 50

100 40 150
'''
七、if 条件
更新于2024年12月14日
if 语句用于根据条件是否满足来执行特定的代码块。 如果条件为 True,则执行 if 语句块中的代码;如果条件为 False,则跳过该代码块。 在 if 和 while 中使用的条件表达式应该返回布尔值(True 或 False),在大多数编程语言中,布尔值 True 和 False 是内置的,可以直接使用,注意使用时要首字母大写。
if 中也同样要注意缩进和冒号!
if 的使用
colours = ['red','green','yellow','orange','blue']
for colour in colours:
    if colour == 'red':                      #if else,==检查时区分大小写
        print(colour.upper(),end=" ")        #  !=  >=  <=
    elif colour == 'yellow':                 #py中使用elif,而不是else if
        print(colour.title(),end=" ")
    else:
        print(colour.lower(),end=" ")
#优化:if colour.lower() == 'white': 这样保证了不因为大小写出错
'''
输出:
RED green Yellow orange blue
'''

numbers =[number*2 for number in range(1,11,2)]
print(numbers)
for number in numbers:                      #这里的number和上一条中的不一样
    if number > 3 and number < 13:          #and  or
        print(str(number) + ' is 3-13')
    elif number <5 or number > 8:
        print(str(number) + ' is our of range')
'''
输出:
2 is our of range
6 is 3-13
10 is 3-13
14 is our of range
18 is our of range
'''

if 'yellow' in colours:                      #  in 查询是否存在
    print('yellow in')
if 'aabbcc' not in colours:                  # not in
    print('it is not colour\n')

mix_colours =['red','pink','aabbcc']         #检查特殊元素并处理
for mix_colour in mix_colours:
    if mix_colour in colours:
        print(mix_colour +' is in this list')
    elif mix_colour not in colours:
        print('new ' + mix_colour)
        colours.append(mix_colour)
        print(colours)
        print(colours.pop())
'''
输出:
yellow in
it is not colour

red is in this list
new pink
['red', 'green', 'yellow', 'orange', 'blue', 'pink']
pink
new aabbcc
['red', 'green', 'yellow', 'orange', 'blue', 'aabbcc']
aabbcc
'''

new =[]
if new:                                       #空列表为False
    print('不是空的')
else:
    print('空的')
'''
输出:
空的
'''
八、字典
更新于2024年12月15日
字典是由一系列格式为 键 : 值 的键值对组成的
字典的生成与嵌套
colours = ['red','green','yellow','orange','blue','pink','black','white']

enemy_1 = {'color':colours[1]  ,  'points':5  }        #键:值,嵌套列表colours
#enemy_1 = dict(color=colours[1], points=5)
enemy_2 = {'color':colours[3]  ,  'points':7  }
enemy_3 = {'color':colours[5]  ,  'points':9  }
enemy_boss1 = {'color':colours[7]  ,  'points':20  }

enemys = [enemy_1, enemy_2, enemy_3, enemy_boss1]        #列表嵌套字典
enemys_num = {'enemy':enemy_1,'enemy2':enemy_2,'enemy3':enemy_3,'boss1':enemy_boss1}
#字典嵌套字典,每个子字典的键都相同
soldier = {
    'type':'敌方',
    'enemy': enemys,                                      #字典嵌套列表
    'number': enemys_num
    }

print(enemy_1)
print(enemy_1['color'])

#对于较长字典,通常以换行隔开对象:
#enemy_1 = {
#    'color':'green',
#    'points':5,
#    ......
#    }
'''
输出:
{'color': 'green', 'points': 5}
green
'''
字典操作
import random  #导入random模块

colours = ['red','green','yellow','orange','blue','pink','black','white']

enemy_1 = {'color':colours[1] , 'points':5}     #新建敌方角色字典,color对应颜色,points对应得分
#enemy_1 = dict(color=colours[1], points=5)    也可使用这种方式
enemy_2 = {'color':colours[3] , 'points':7}     #字典嵌套列表colours
enemy_3 = {'color':colours[5] , 'points':9}
enemy_boss1 = {'color':colours[7] , 'points':20}

enemys = [enemy_1, enemy_2, enemy_3, enemy_boss1]   #列表嵌套字典
enemys_num = {'enemy':enemy_1,'enemy2':enemy_2,'enemy3':enemy_3,
        'boss1':enemy_boss1}                #字典嵌套字典,每个子字典的键都相同
soldier = {
    'type':'敌方',
    'enemy': enemys,                      #字典嵌套列表
    'number': enemys_num
    }

enemy_1['x_position'] = 4    #添加新元素
enemy_1['y_position'] = 25
enemy_1['speed'] = 'slow'
print("enemy_1的属性:" + str(enemy_1))
#输出:enemy_1的属性:{'color': 'green', 'points': 5, 'x_position': 4, 'y_position': 25, 'speed': 'slow'}

if enemy_1['speed'] == 'slow':
    x_increment = 1
enemy_1['x_position'] = enemy_1['x_position'] + x_increment  #修改键值
print("enemy_1的 x 轴速度:" + str(enemy_1['x_position']))
print("此时enemy_1的属性:" + str(enemy_1))
#输出:enemy_1的 x 轴速度:5
#输出:此时enemy_1的属性:{'color': 'green', 'points': 5, 'x_position': 5, 'y_position': 25, 'speed': 'slow'}

del enemy_1['speed']     #删除元素
print('删除后enemy_1的属性:' + str(enemy_1))
#输出:删除后enemy_1的属性:{'color': 'green', 'points': 5, 'x_position': 5, 'y_position': 25}

for key,value in enemy_1.items():
                                         #遍历,.items()返回对象的键值列表,key,value分别存键,值
    print(str(key).title() + " : ",end="")
    print(value)
print('')
'''
Color : green
Points : 5
X_Position : 5
Y_Position : 25
'''

for key in enemy_1.keys():          #.keys()返回键表
    print(key,end=' ')
print('')
for key in enemy_1:                 #与上相同
    print(key,end=' ')
print('')
'''
color points x_position y_position
color points x_position y_position
'''

for key in sorted(enemy_1.keys()):  #sorted顺序排序
    print(key.title(),end=' ')
print('')
#输出:Points Color X_Position Y_Position

for value in enemy_1.values():     #.values()返回值表
    print(value,end=' ')
print('')
#输出:green 5 5 25

for value in set(enemy_1.values()):     #set()去除值重复项
    print(value,end=' ')
print('')
#输出:green 25 5

#enemys = [enemy_1, enemy_2, enemy_3, enemy_boss1]  列表嵌套字典(上面已定义)
for enemy in enemys:
    print(enemy)
print('')
'''
{'color': 'green', 'points': 5, 'x_position': 5, 'y_position': 25}
{'color': 'orange', 'points': 7}
{'color': 'pink', 'points': 9}
{'color': 'white', 'points': 20}
'''

npcs = []
for num in range(5):                    #range生成npc
    new_npc = {'color':colours[1],'points':5}
    npcs.append(new_npc)
for npc in npcs:
    print(npc)
print('总共生成个数:'+ str(len(npcs)) +'\n')
'''
{'color': 'green', 'points': 5}
{'color': 'green', 'points': 5}
{'color': 'green', 'points': 5}
{'color': 'green', 'points': 5}
{'color': 'green', 'points': 5}
总共生成个数:5
'''

for npc in npcs[2:4]:                   #修改其中元素的键值
    if npc['color']== colours[1]:
        npc['color'] = colours[0]
        npc['points'] = random.randint(5,15)  #随机生成整数
for npc in npcs:
    print(npc)
print('')
'''
{'color': 'green', 'points': 5}
{'color': 'green', 'points': 5}
{'color': 'red', 'points': 7}
{'color': 'red', 'points': 5}
{'color': 'green', 'points': 5}
'''

#soldier前方已定义
print('类型:'+ soldier['type'])
for enemy,num in zip(soldier['enemy'],soldier['number']):
                                                #zip(object,object)使用两个循环条件
    print('编号:'+ str(num) +' 信息:'+ str(enemy))
print('')
'''
类型:敌方
编号:enemy 信息:{'color': 'green', 'points': 5, 'x_position': 5, 'y_position': 25}
编号:enemy2 信息:{'color': 'orange', 'points': 7}
编号:enemy3 信息:{'color': 'pink', 'points': 9}
编号:boss1 信息:{'color': 'white', 'points': 20}
'''

for num,enemy in soldier.items():                #打印整个字典,与上明显不同
    print('编号:'+ str(num) +' 信息:'+ str(enemy))
#多重嵌套用多个for
'''
编号:type 信息 敌方
编号:enemy 信息 [{'color': 'green', 'points': 5, 'x_position': 5, 'y_position': 25}, {'color': 'orange', 'points': 7}, {'color': 'pink', 'points': 9}, {'color': 'white', 'points': 20}]
编号:number 信息 {'enemy': {'color': 'green', 'points': 5, 'x_position': 5, 'y_position': 25}, 'enemy2': {'color': 'orange', 'points': 7}, 'enemy3': {'color': 'pink', 'points': 9}, 'boss1': {'color': 'white', 'points': 20}}
'''
九、while 循环
更新于2025年1月6日
input 输入与 while
message = input('input : ')    #input()输入
print(message.title())
'''
input : abcd123
Abcd123
'''

age = input('\nhow old are you (only number): ') #输入为字符串,转为数值才能处理
age = int(age)                          #input返回为字符串,用int转为数值才能用于计算
print('over 18: '+ str(age>=18))        #判断满没满18,age>=18成立为True
if age % 2 == 0:                        #判断年龄数奇偶
    print('age is even\n')
else:
    print('age is odd\n')
'''
how old are you (only number): 20
over 18: True
age is even
'''

number_3 = 1
while number_3 <= 5:                    #while循环
    print(number_3)
    number_3 += 1
'''
1
2
3
4
5
'''

active = True
while active:                          #无限循环,条件退出
    message_2 = input('\nNO.1 say something(input quit to quit): ')
    if message_2 =='quit':             #输入quit使while循环退出
        active = False
    else:
        print(message_2 +' is input')
'''
NO.1 say something(input quit to quit): ab
ab is input

NO.1 say something(input quit to quit): abc
abc is input

NO.1 say something(input quit to quit): quit
'''

while True:                             #无限循环,break退出(for也可用)
    message_2 = input('\nNO.2 say something again(input quit to quit): ')
    if message_2 =='quit':
        break
    else:
        print(message_2 +' is input')
'''
NO.2 say something again(input quit to quit): abcd
abcd is input

NO.2 say something again(input quit to quit): quit
'''

while number_3 <= 15:                   #continue重新执行循环
    if number_3 % 2 == 0:               #偶数被过滤,输出奇数
        number_3 +=1                    # %:取余数 /:除法 *:乘法 **:幂运算
        continue
    print(number_3)
    number_3 +=1
#无论什么循环,至少设置一种结束方式,避免无限循环
#若陷入无限循环,通常可用ctrl+c强行结束,或直接关闭终端也行
'''
7
9
11
13
15
'''
while 处理列表、字典
unconfirmed_users = ['abc','def','qwe','asd','zxc','byd']
confirmed_users = []

while unconfirmed_users:                    #移动列表元素,[]可规定范围
    user = unconfirmed_users.pop().lower()
    print("已验证: "+ user.title())
    confirmed_users.append(user)
print('\nconfirmed_users:')
for confirmed_user in confirmed_users:
    print(confirmed_user.title(),end=' ')
'''
已验证: Byd
已验证: Zxc
已验证: Asd
已验证: Qwe
已验证: Def
已验证: Abc

confirmed_users:
Byd Zxc Asd Qwe Def Abc
'''

while 'byd' in confirmed_users:           #删除列表元素
    print('\nbyebye~~')
    confirmed_users.remove('byd')         #相当于.remove()多加层while进行确认
print(confirmed_users)
'''
byebye~~
['zxc', 'asd', 'qwe', 'def', 'abc']
'''

users_2 = {}
active_2 = True
while active_2:                             #循环输入
    name = input('\nwhat`s you name: ')
    age = input('how old are you: ')
    users_2[name] = age                     #对字典插入元素
    ask = input('\nanother user (yes/no)?')
    if ask == 'no':
        active_2 = False
print('\nusers:')
for name,age in users_2.items():
    print(name +' is '+ age +' now!!')
'''
what`s you name: aaa
how old are you: 11

another user (yes/no)?yes

what`s you name: bbb
how old are you: 22

another user (yes/no)?no

users:
aaa is 11 now!!
bbb is 22 now!!
'''
十、函数(功能实现)
更新于2025年1月6日
10.1. 函数简介
Python 函数是代码的可重用块,用于执行特定的任务。函数可以帮助你组织代码,提高代码的可读性和可维护性。函数生成后可以调用,也可导入到其它文件(类似C语言的 .h文件里的声明)。
各种库包及灵活的函数使用方式,使Python在功能实现上非常强大。
在 Python 中,使用 def 关键字来定义函数。函数定义的基本语法如下:
def 函数名(参数列表):
    函数体
函数名: 是函数的标识符,可以是任意有效的标识符。
参数列表: 是传递给函数的参数,可以没有参数,也可以有多个参数,参数之间用逗号分隔。
函数体: 是函数的实际代码块,缩进来表示。 函数中定义的变量只在函数体里有效
下面是一些函数示例
函数示例/参数传入方式
def hello_1(v1,v2):                   #def定义函数
    #''打印v1,v2''                    #生成函数文档时用到
    print(v1 + v2)
hello_1('hello1 ','world1')           #位置实参

def hello_2(v1,v2):
    #''打印v1,v2''
    print(v1 + v2)
hello_2(v2 = 'world2',v1 = 'hello2 ')  #关键字实参

def hello_3(v1,v2 = 'world3'):         #指定形参默认值
    #hello_3(v2 = 'world',v1)     运行报错,和c+一样,未赋值形参放前面
    #''打印v1,v2''
    print(v1 + v2)
hello_3('hello3 ')
hello_3('hello4 ','world4')            #形参默认值可覆盖
hello_3(v1 ='hello5 ')
hello_3(v1 = 'hello6 ',v2='world5')

def sum_1(v1,v2):
    #v1,v2求和
    sum_a = v1 + v2
    return sum_a                       #返回值
sum_value = sum_1(100,50)              #用一个变量来存储计算结果
print(sum_value)
print(sum_1(200,50))

def hello_4(hello,name,age =''):
    #可选择实参
    if age:                            #用if使实参变成可选的,有传入就执行if
        full_sentence = hello +' '+ name +' are'+ age
    else:
        full_sentence = hello +' '+ name
    return full_sentence
print(hello_4('good morning','my son','111'))
print(hello_4('getout','who?'))
'''
hello1 world1
hello2 world2
hello3 world3
hello4 world4
hello5 world3
hello6 world5
150
250
good morning my son are111
getout who?
'''
更进一步
def build_1(name,age):
#产生名字和年龄的字典
person = {'name':name,'age':age} #返回字典
return person
man_1 = build_1('jack','46')
print(man_1)
def build_2(name,age):
#产生列表
person = [name,age] #返回列表
return person
print(build_2('lihua',30))
def build_3(num_1,num_2):
num_4 = 1
while num_1 < num_2: #while执行算法
num_3 = num_1 * num_2
num_1 += 1
num_4 = num_4 * num_3
return num_4
print(build_3(1,3))
def users(names):
#传送列表
for name in names: #传送列表
print('name is '+ name)
user_names = ['jack','ano','soyo','hina']
users(user_names)
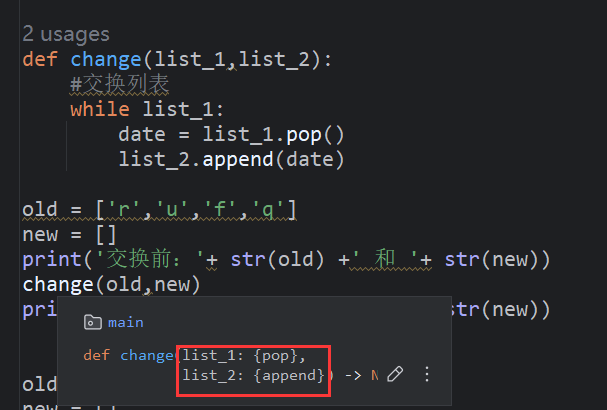
def change(list_1,list_2):
#交换列表
while list_1:
date = list_1.pop()
list_2.append(date)
old = ['r','u','f','q']
new = []
print('交换前:'+ str(old) +' 和 '+ str(new))
change(old,new) #两个函数完成列表交换
print('交换后:'+ str(old) +' 和 '+ str(new))
old = ['r','u','f','q']
new = []
print('交换前:'+ str(old) +' 和 '+ str(new))
change( old[:] ,new) #list[:]创建list的副本
print('交换后:'+ str(old) +' 和 '+ str(new))
def printf_1(list_2):
#打印列表
for date in list_2:
print(date,end=' ')
printf_1(new)
print()
def printf_2(*v): #*v:参数带*允许传递任意数量的位置参数
print(v)
printf_2('1','12','123','1234')
def item_1(title,*vs): #形参*V放后面
print('标题: '+ title)
for v in vs:
print('- '+ v)
item_1('成分','水','盐','糖')
def build_userinform(name,age,**informs): #**informs:参数带**允许传递任意数量的关键字参数
user_inform = {}
user_inform['name'] = name
user_inform['age'] = age
for key,value in informs.items():
user_inform[key] = value
return user_inform
user_inform = build_userinform('kasumi',20,level=10,instrument='guiter')
print(user_inform)
'''
{'name': 'jack', 'age': '46'}
['lihua', 30]
18
name is jack
name is ano
name is soyo
name is hina
交换前:['r', 'u', 'f', 'q'] 和 []
交换后:[] 和 ['q', 'f', 'u', 'r']
交换前:['r', 'u', 'f', 'q'] 和 []
交换后:['r', 'u', 'f', 'q'] 和 ['q', 'f', 'u', 'r']
q f u r
('1', '12', '123', '1234')
标题: 成分
- 水
- 盐
- 糖
{'name': 'kasumi', 'age': 20, 'level': 10, 'instrument': 'guiter'}
'''
10.2. 函数的声明
若我们使用的是Pycharm,会发现代码中函数有显示对应的参数,同时将光标移至函数上,还有进一步的说明,部分函数还说明了参数的操作, 这在使用函数时提供了极大的方便,我们在编写函数时也可提供说明信息,这样调用时就能准确知道各参数的作用。

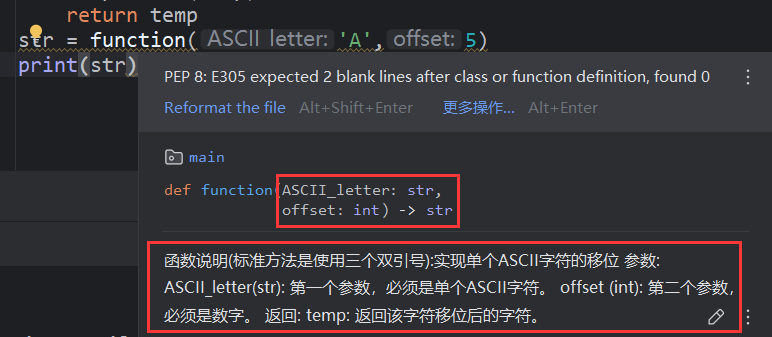
给函数添加声明模板:
def function(ASCII_letter : str, offset : int) -> str:
    #参数 :类型,函数名后加 -> 类型,可以指定输入参数和返回值格式,但只作说明不会强制要求
    """
    函数说明:实现单个ASCII字符的移位
    参数:
    ASCII_letter(str): 第一个参数,必须是单个ASCII字符。
    offset (int): 第二个参数,必须是数字。
    返回:
    temp: 返回该字符移位后的字符。
    """
    temp = ord(ASCII_letter) + offset   #ord()函数将字符转为ASCII码,chr()反之
    temp = chr(temp)
    return temp
str = function('A',5)
print(str)
#输出:F
将光标移到函数上可以看到:
10.3. 函数的导入
在Python中,库(library)和包(package)是组织和重用代码的重要机制。库和包提供了一系列函数和类,供使用者调用。 Python有一些自带的库,无需额外安装,第三方的库需要用户通过pip等工具进行安装。
这里我们使用自己建立的文件用于导入,在当前目录新建名为 note_printf.py 的文件。在该文件中新建函数:
#note_printf.py文件
def printf(*vs):
'''模块打印'''
for v in vs:
    print('模块打印输出: '+ str(v))
main.py中导入模块
import note_printf                          #函数存在模块中,独立文件保存(首选)
#def printf(*vs):
#    模块打印
#    for v in vs:
#        print('模块打印输出: '+ str(v))
note_printf.printf('aa','bb',123)

from note_printf import printf              #导入特定函数(其次)
printf('cc')                                #此时可不用句点note_printf.
#from module_name import function_0,function_1

import note_printf as n_p                  #将模块重命名
n_p.printf('dd')

from note_printf import printf as n_p_p    #模块中函数重命名
n_p_p('ee')

from note_printf import *                  #导入模块中所有函数
printf('ff')
#和直接import模块相比,后面函数使用时可以省略句点(非自己写的大型模块不建议使用此方式)
'''
模块打印输出: aa
模块打印输出: bb
模块打印输出: 123
模块打印输出: cc
模块打印输出: dd
模块打印输出: ee
模块打印输出: ff
'''
#def fuction_name(
#       parameter_0 , parameter_1 , parameter_2 , parameter_3 , parameter_4 ,
#       parameter_5 , parameter_6='abcd' , parameter_7=123 )
#多参数函数声明使用换行,方便查看
#形参默认值等号两边没空格(参考paremeter6,7),回车后,两个tab距离
#多个函数间用两个空行隔开,所有import放在文件开头,文件注释后面
#注意导入模块时标准库在前,隔行导入自己的库,遵循PEP8规范
十一、类(面向对象)
更新于2025年1月10日
面向对象:面向对象是将相关的数据和方法组织为一个整体来看待,从更高的层次来进行系统建模,以更贴近事物的自然运行模式。 可以将现实世界的事物抽象成对象,现实世界中的关系抽象成类、继承,从而帮助人们实现对现实世界的抽象与数字建模。有以下几个特点。
- 类:类是对具有相同属性和行为的对象的抽象。类定义了对象的属性和方法,以及这些属性之间的约束和关系。通过类,可以创建多个具有相同属性和方法的对象。 例如:定义一个名为学生的类。
- 对象:对象是类的实例化,即类的一个具体实例。对象是程序的基本单元。 例如:定义一个名为李华的对象,他的属性是学生这一个类。
- 继承:继承是面向对象编程中实现代码复用的重要手段。通过继承,可以创建一个新的类(子类),它继承了一个或多个已有类(父类或基类)的属性和方法。 子类可以重写父类的方法,也可以添加新的属性和方法。 例如:定义一个名为大学生的类,他继承于学生,有学生的全部属性和方法。
- 多态(重载):多态允许一个接口有多种实现方式。在面向对象编程中,多态通常通过方法的重写和接口的实现来实现。 多态使得程序能够根据不同的对象类型来执行不同的操作,从而提高了程序的灵活性和可扩展性。
- 封装:封装是将数据和操作数据的方法绑定在一起的一种机制。通过封装,可以隐藏对象的内部实现细节,只暴露必要的接口给外部使用。 这有助于保护对象的内部状态,防止外部干扰和破坏。
使用面向对象的编程方法,提高了代码的重用率、可维护性和可扩展性,可以大大提高开发效率和软件质量。
一个类的示例
# main.py
class Person():                 #新定义一个类(通常首字母大写),括号可以省略为class Person:
    """
    Person类
    """
    def __init__(self, name, age):  #__init(self,属性,属性,...)__ 这一个初始化必须有!
        #''初始化属性''
        self.name = name         #self 表示这是类自身的属性或方法
        self.age = age
        self.times = 0            #赋初始值

    def say(self, word):          #类库的方法,必须有第一个形参'self'
        """
        打印想说的话(这里是说明文档,养成打注释的好习惯)
        """
        print(word + ' by Person类生成的对象:' + self.name)

    def howtimes(self):
        """输出计数器值"""
        print('计数器:' + str(self.times))

    def change_times(self, times):
        """修改计数器值为参数 times"""
        if times > self.times:
            self.times = times      #self.times是类的属性,times是调用函数时传入的参数
        else:
            print('error change!!')

    def increment_times(self, times):
        """给计数值增加参数 times"""
        self.times += times
    #注意缩进对齐

people_1 = Person('李华', 111)     #创建名为 people_1 的对象实例,由 Person 类产生
print(people_1.name)               #直接打印对象的属性
print(people_1.age)
print()

people_1.say('哇沃!')              #调用类库方法
people_1.howtimes()
print()

people_1.times = 50                 #直接修改对象
people_1.howtimes()
print()

people_1.change_times(100)          #通过类库函数修改
people_1.howtimes()

people_1.increment_times(23)
people_1.howtimes()
print()

people_1 = Person('韩梅梅', 222)    #重新创建会覆盖
people_1.say('欧系给')
people_1.howtimes()
'''
李华
111

哇沃! by Person类生成的对象:李华
计数器:0

计数器:50

计数器:100
计数器:123

欧系给 by Person类生成的对象:韩梅梅
计数器:0
'''
类的继承和嵌套
# 续上节Person类
class Hp():
    """血量的类"""
    def __init__(self, value=200):      # 若创建对象时没有给值,则初始化 value =200
        """初始化"""
        self.hp = value

    def describe_hp_value(self):
        print('野怪HP: ' + str(self.hp))

    def big_or_small(self):
        if self.hp > 1000:
            type = 'big'
        else:
            type = 'small'
        print('this is a ' + type + ' HP')


class Three_wolves(Person):             # 创建Person的子类,括号内填入父类名
    """三狼类,Person的子类"""
    def __init__(self, name, age):
        super().__init__(name, age)     # 继承属性(父类又称超级类),使父类和子类关联起来
        self.exp = 80
        self.b3w_hp = Hp()              # 类嵌套,其它类作实例属性,这里默认为200

    def describe_exp(self):
        print('b三狼exp: ' + str(self.exp))

    def change_times(self):                    # 子类对父类方法进行重载(多态)
        print('刷新次数: ' + str(self.times))  # 三狼类没有times属性,继承自父类


b_3wolf = Three_wolves('b三狼', 1)
b_3wolf.say('别老惦记我')
b_3wolf.describe_exp()
b_3wolf.change_times()
b_3wolf.increment_times(2)                      # 子类使用父类的方法
print('times属性增加2后:' + str(b_3wolf.times) + '\n')

b_3wolf.b3w_hp.describe_hp_value()              # 类嵌套函数输出
b_3wolf.b3w_hp.big_or_small()
b_3wolf.b3w_hp.hp = 1234                        # 类嵌套修改属性
b_3wolf.b3w_hp.describe_hp_value()
b_3wolf.b3w_hp.big_or_small()
'''
别老惦记我 by Person类生成的对象:b三狼
b三狼exp: 80
刷新次数: 0
times属性增加2后:2

野怪HP: 200
this is a small HP
野怪HP: 1200
this is a big HP
'''
为了文件整体结构较好,可新建一个文件用于存放相关的类。新建名为 interaction.py 的文件。
在 interaction.py 中新建类
class Skill:
    """技能相关的类"""
    def __init__(self,name,skill_name,time):
        self.name = name                 #角色名字
        self.time = time                 #技能冷却时间
        self.skill_name = skill_name     #技能名字
        self.damage = 100                #技能伤害

    def get_name(self):
        """获取释放技能的角色"""
        print(self.name +' attack:')

    def release_skill(self):
        """释放技能"""
        print(self.skill_name.upper() +' at '+ str(self.time) +' CD')

    def total_damage(self):
        """造成伤害"""
        print('total damage: '+ str(self.damage))


class Pawn:
    """小兵的类"""
    def __init__(self,name,hp,damage_received):
        self.name = name                        #小兵类型
        self.hp = hp                            #生命值
        self.damage_received = damage_received  #受到伤害
        self.refresh_time = 30                  #刷新时间

    def pawn_atked(self):
        """小兵受击"""
        print(self.name +' received '+ str(self.damage_received) +' damage!')

    def change_hp(self):
        """计算伤害"""
        if self.hp - self.damage_received > 0:
            self.hp = self.hp - self.damage_received
            print('now HP: '+ str(self.hp))
        else:
            print('This pawn died!')

    def pawn_refresh(self):
        """输出下一波刷新时间"""
        print(str(self.refresh_time) +' seconds to next refresh')
在 main.py 中导入
from interaction import Skill, Pawn

new_skill = Skill('双面毒刃', 'E', 20)
new_skill.get_name()
new_skill.release_skill()
new_skill.total_damage()
print()

new_pawn = Pawn('远程兵', 430, 200)
new_pawn.pawn_atked()
new_pawn.change_hp()
new_pawn.damage_received = 231
new_pawn.change_hp()
new_pawn.pawn_refresh()
print()
'''
双面毒刃 attack:
E at 20 CD
total damage: 100

远程兵 received 200 damage!
now HP: 230
This pawn died!
30 seconds to next refresh
'''
标准库:Python标准库是一组模块,安装的Python都包含它。同样使用 import 来导入。
使用标准库 collections
from collections import OrderedDict

item_1 = OrderedDict()  # OrderedDict() 新建保留顺序的字典
item_1['cc'] = '22'
item_1['aa'] = '33'
item_1['bb'] = '11'

for name, num in item_1.items():
    print(name + ' is ' + num)
# 多使用标准库方便很多。注意导入模块时标准库在前,隔行导入自己的库,同时满足规则PEP-8
'''
cc is 22
aa is 33
bb is 11
'''
十二、文件
更新于2025年1月14日
12.1. 文件操作
除了 .py 文件,还有各种类型的文件(例如: .txt .json .mp3 .avi .exe .cpp等),在设计时常常会使用各种文件的内容进行处理。
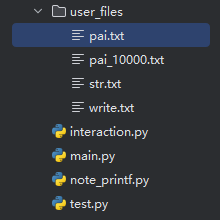
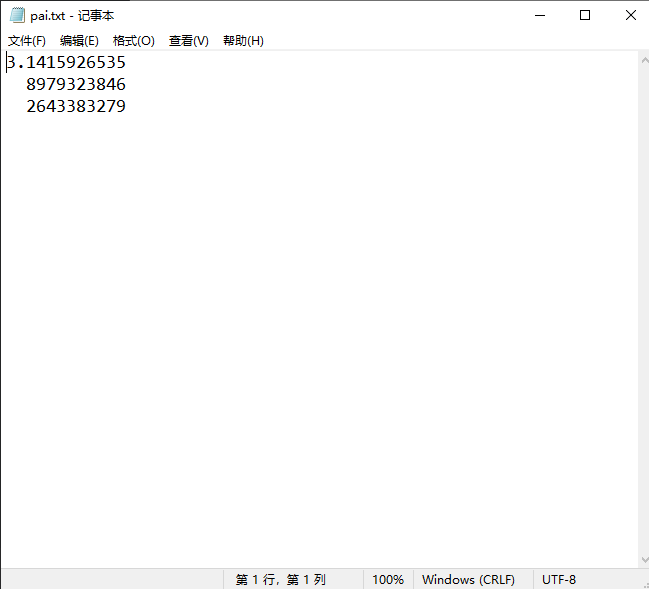
在当前目录新建文件夹 user_files ,在里面添加文件,文件内容可以自己设置,我这里创建以下几个文件,分别是 π 小数部分的前30位(每10位换行)的 pai.txt, π 小数部分的前10000位的 pai_10000.txt, 存放有字符的 str.txt,以及用于写入的空白文件 write.txt。

基础文件操作
with open('user_files\\pai.txt') as file_1: #'文件夹\\文件名' 打开当前目录二级文件,和模块一样,文件只能在当前目录打开
# \\转义字符表示反斜杠\,也可用斜杠user_files/pai_txt,根据习惯和兼容性自行选择
contents_1 = file_1.read() #.read()读取全部数据
print(contents_1.strip())
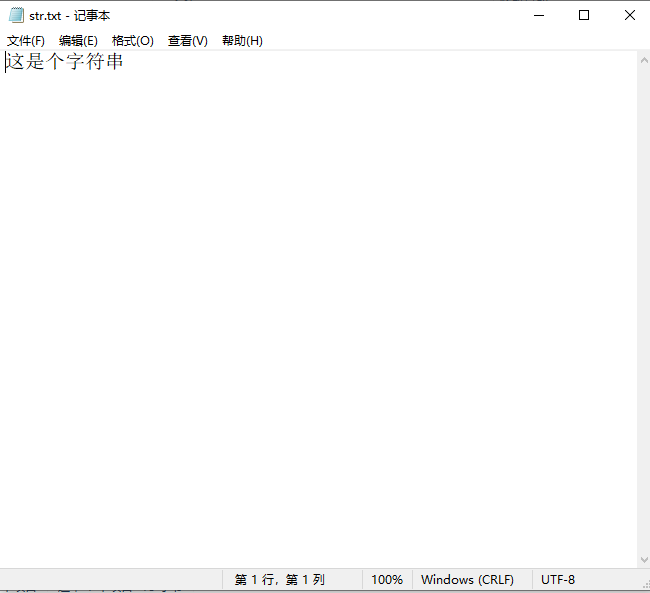
with open(r'user_files\str.txt',encoding='utf-8') as file_2:
#encoding选择编解码方式,r 表示文本固定,使转义字符无效(即\)
contents_2 = file_2.read()
print(contents_2)
file_3 = r'D:\project\pycharm\python_note\user_files\pai.txt' #打开指定绝对路径文件
with open(file_3,encoding='utf-8') as file_3:
contents_3 = file_3.read()
print(contents_3)
file_4 = r'user_files\pai.txt'
with open(file_4) as file_4:
for line in file_4: #for循环打印行
print(line.rstrip())
file_4 = r'user_files\pai.txt'
with open(file_4) as file_4: #with打开时,文件只在with块内可用
lines = file_4.readlines() #.readlines()将数据以每行为元素存储在一列表中,该列表可以跳出with段使用
for line in lines:
print(line.rstrip()+' ←文件外部运行')
pai_str = ''
for line in lines: # lines是刚才复制 file_4 的列表变量
pai_str += line.strip() # 复制
print(pai_str + ' length: '+ str(len(pai_str)))
print(pai_str[:20] + ' length: '+ str(len(pai_str))) # 选取前20位
with open(r'user_files\pai_10000.txt') as file:
file_5 = file.readlines()
pai_10000 = ''
for line in file_5:
pai_10000 += line.strip()
print(pai_10000[:200]+'......')
num_1 = '5981'
if num_1 in pai_10000: #检测/查找是否有这一元素
print(num_1 +' in this number')
else:
print(num_1 +' not in this number')
file_6 = r'user_files\write.txt'
num_2 = 0
with open(file_6, 'r+') as file: # r读 , w写 , a附加 , r+读写
for line in file:
num_2 += 1
print(line.title())
file.write('this num is: ' + str(num_2) + '\n') #可以在white.txt文件中看到输入的数据
# 文件以str打开内容,数值得用int,float转换
# 使用 with 时,由py决定什么时候关闭文件,不用使用 close(),若直接使用 open(),则需要加上。
'''
3.1415926535
8979323846
2643383279
这是个字符串
3.1415926535
8979323846
2643383279
3.1415926535
8979323846
2643383279
3.1415926535 ←文件外部运行
8979323846 ←文件外部运行
2643383279 ←文件外部运行
3.141592653589793238462643383279 length: 32
3.141592653589793238 length: 32
3.141592653589793238462643383279502884197169399375105820974944592307816406286208998628034825342117067982148086513282306647093844609550582231725359408128481117450284102701938521105559644622948954930381......
5981 in this number
'''
12.2. 异常处理
Python使用称为异常的特殊对象来管理程序的运行,每当程序出错时,都会创建一个异常对象(即报错traceback),若编写了处理该异常的代码,程序将继续运行,若未对异常进行处理,则程序停止, 显示一个traceback,其中包含关于异常的报告。
print(5/0)                  # 0不能为被除数
print('这一条不运行')
'''
Traceback (most recent call last):
  File "D:\project\pycharm\python_note\test.py", line 1, in
    print(5/0)
          ~^~
ZeroDivisionError: division by zero
'''
使用 try-except 代码块进行异常处理
try:                                       # 异常处理,类似if
    print(5/0)
except ZeroDivisionError:                  # 根据不同错误,选择不同的执行
    print('zero_error_1 !!')
print('程序继续运行了')
# ZeroDivisionError 为内置异常(如刚才的报错信息),也可自定义异常
'''
zero_error_1 !!
程序继续运行了
'''
使用该方式设计一个除法器
除法器
print('Input two number, i`ll divide them:')    #除法
print(' (Enter q to quit)\n')
while True:
    num_3 = input('First number: ')
    if num_3=='q':
        break
    num_4 = input('Second number: ')
    if num_4=='q':
        break
    try:
        answer_1 = int(num_3)/int(num_4)        # 将try用于可能出错的代码中
    except ZeroDivisionError:
        print('\nYou can`t divide zero!!\n')
    except ValueError:
        print("\nPlease enter 'int' value!!\n")
    else:                                      # try里的语句成功运行时才会运行此 else
        print('The answer is: '+ str(answer_1))
'''
Input two number, i`ll divide them:
 (Enter q to quit)

First number: 5
Second number: 0

You can`t divide zero!!

First number: 5
Second number: a

Please enter 'int' value!!

First number: 1
Second number: 2
The answer is: 0.5
First number: q
'''
设计一个函数,用于计算文件中英文单词数量
计算文件英文单词数
def count_words(filename):
    """输出所给文件所包含的单词数"""
    try:
        with open(filename,encoding='utf-8') as file:
            contents = file.read()
    except FileNotFoundError:                   # 文件不存在的处理
        print('\nnot find this file (2)')
    else:
        words = contents.split()                # .split()生成包含所有英文单词的列表
        num_words = len(words)
        print('\n'+ filename + ' have ' + str(num_words) + ' words')
count_words('user_files/write.txt')
count_words('user_files/pai_10000.txt')         # 每行会额外计算一个数
count_words('user_files/一个文件.txt')
#多个文件可用数组或字典,循环调用
'''
user_files/write.txt have 8 words

user_files/pai_10000.txt have 24 words

not find this file
'''
当不想有错误提示时,可用 pass 进行跳过。
try:
    with open('一个文件.txt') as file:
        contents = file.read()
except FileNotFoundError:
    pass                  #pass跳过,即什么都不做,不提示错误继续运行
''''''
12.3. json 存储
JSON(JavaScript Object Notation)是一种轻量级的数据交换格式,最初是为JavaScript开发的,后续被众多语言广泛采用。
特点:JSON数据结构很容易区分数据类型,更容易解释数据,无需提前知道数据结构,支持多种数据类型,可以组合起来表达大多数数据的结构。
JSON数据由键值对组成,每个键值对之间用逗号分隔。对象使用大括号{}包裹,键值对之间使用冒号:分隔。数组使用中括号[]包裹,元素之间使用逗号分隔。
新建一个 name_js.json 的文件。
json 的使用例
import json                #使用json文件来在不同程序中传递数据,必须要有json模块

'''
name_js.json:
{
    "name": "Alice",
    "age": 30,
    "city": "New York",
    "is_student": false,
    "courses": ["Math", "Science"],
    "address": {
        "street": "123 Main",
        "zipcode": "10001"
    }
}
'''
try:
    with open('user_files/name_js.json', 'r', encoding='utf-8') as json_file:
        data = json.load(json_file)      # 加载,json.load(f)读文件f

        # 处理字典元素
    data['courses'].append('Art')        # 增加一门课程
        data['city'] = 'Los Angeles'     # 修改城市

        # 将修改后的数据写回JSON文件
        with open('user_files/name_js_new.json', 'w', encoding='utf-8') as json_file:  # 写,没有文件自动创建文件
            json.dump(data, json_file, indent=4)                                       # json.dump(v,f),v存储进文件f
except FileNotFoundError:
    print('没有此文件')
十三、测试
更新于2025年1月14日
在Python中,测试代码通常涉及使用单元测试框架来验证代码的正确性。Python的标准库包含一个强大的单元测试框架,称为unittest。此外, 还有一些第三方库如pytest和nose2也非常流行。以下是一些基本的方法来编写和运行Python测试。
unittest 测试
import unittest                               # 测试所用 unittest 模块

def product(num_a, num_b):                    # 被测试函数
    return num_a * num_b

class Product_test(unittest.TestCase):        # 测试的类,必须继承unittest.TestCase

    def test_product(self):                   # 只测试命名最前面带 test_ 的用例
        num = product(7, 8)
        self.assertEqual(num, 56)     # self.assertEqual(v1,v2),比较v1v2是否相等,相同通过,不同报错
        self.assertEqual(num,50)

    def test_product_2(self):                 # 测试不通过,报错
        num = product(8, 9)
        self.assertEqual(num, 17)

    def product_3(self):                      # 没有test_,不测试
        num = product(5, 6)
        self.assertEqual(num, 30)

if __name__ == '__main__':
    unittest.main()                           #固定语法,测试的主函数,必须有
# 测试用例基本都是使用 self.assert___ ,下划线内根据需求进行填写
'''不同编译器测试的输出结果一致,但格式不一定相同,就自行进行查看了'''
最后
更新于2025年1月14日
基础的语法介绍就结束了,后续可自行进行扩展学习,包括但不限于:标准库,各种第三方库,不同语言间合用,特殊场景(如micropython)等。 有想扩展的也可以和我联系,不过填坑速度就不一定比得上挖坑了( ̄▽ ̄)